
Keeping backups of your data is increasingly more important in our digital and connected world but I regularly hear stories of people that don't. These stories usually start with 'my phone/laptop broke and I lost all of my stuff' or more recently 'I got ransomware'. Backing up your stuff is now cheap, easy and secure.
Why backup?
Hopefully the reasons to backup your data are fairly clear but so often I see people wanting to create backups in the aftermath of an event where they've lost all or most of their data. They store their entire life on their PC and the HDD suddenly dies one day. All of their precious pictures on their phone are lost forever when they lose the device. More recently we also have to contend with the threat of ransomware too, nasty software that once it infects your PC will encyrpt all of your files and only allow you to decrypt them when you pay a fee. The solution to all of these problems is backups. Get a good backup solution in place now before you need it and hope that you never need to use it.
Google Cloud Platform
I've been keeping an eye on Google Cloud Platform recently as they've been doing some really interesting things in the cloud hosting space. Their UI is clean, their services are fully featured and the pricing is incredibly competitive. I may write up a little more on some of the other things I've been playing around with but this blog is about Cloud Storage and how you can leverage it for insanely easy backup.

Cloud Storage
The Cloud Storage offering is going to be the focus of this article and there are 4 different types of storage you can use.

I won't be talking about Multi-Regional or Regional storage here as they aren't suited to the kind of backups I want to make. I want to make long term backups of my data, the kind of backups that you only use if something goes seriously wrong like your NAS drive has a catastrophic failure or your house burns down. This is often known as disaster recovery and isn't a replacement for something like Dropbox that you might be familiar with. Dropbox and similar services host files that you want frequent access to, that can change at the drop of a hat and are highly flexible. Disaster recovery, or sometimes cold storage, is where you back something up and hopefully never need to recover it because it means something has gone horribly wrong.
Nearline and Coldline
For the average user like you or me there is very little difference between these 2 options. The only things it's worth pointing out are the following:
Nearline: $0.01/GB/month storage, minimum 30 day storage, $0.01/GB recovery.
Coldline: $0.007/GB/month storage, minimum 90 day storage, $0.05/GB recovery.
To do some rough price comparisons let's say we have 250GB of data we want to backup. That would give us the following costs:
Nearline: $2.50/month storage, $2.50 full recovery.
Coldline: $1.75/month storage, $12.50 full recovery.
Depending on how much you plan to store and how much you want to drive that monthly cost down will largely dictate which plan you choose. I'm going for Coldline because I have Dropbox for regular file backup and Coldline is mainly going to be a backup for my local Linux server that also serves as a NAS with RAID. The chances of me needing to recover this data are small so I'm happy with the increase recovery cost. It's also worth nothing that you don't need to recover your entire backup, you can just recover specific files too.

Getting Started
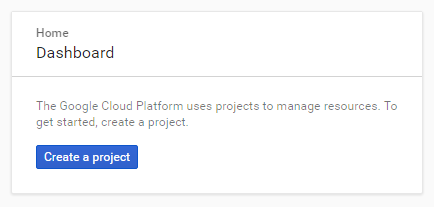
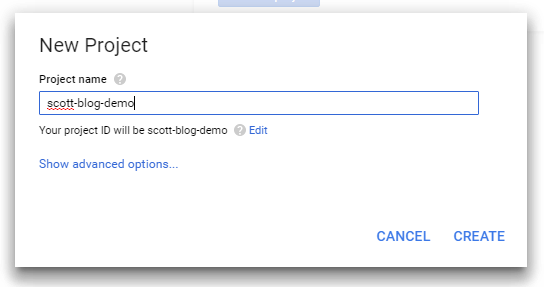
Head over to the Archival Storage page and either setup an account or hit the Try It Free button to get started. Once you've setup your account and you're signed in you can create a new project to work with and give it a name.
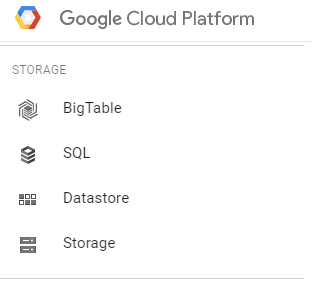
Once the new project is created, click the hamburger/menu button in the top left and find the Storage option.
In the Storage section you need to create a new bucket, select the appropriate type of Bucket, Coldline for me, and then give it a name and a region.

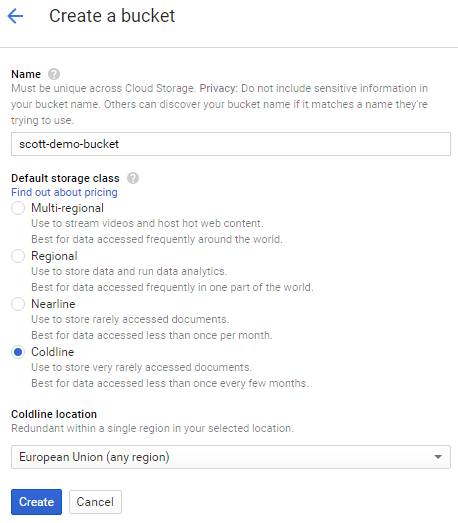
Once you hit create the bucket will be created for you and it's literally ready to go!
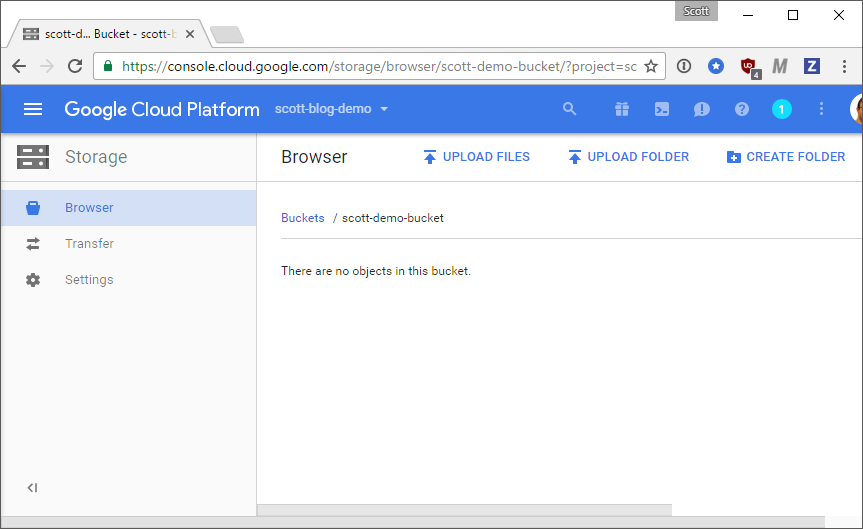
You can now upload any files you like to the bucket for backup! Depending how you structure your files you may want to use a sensible folder structure inside the bucket. I have folders for videos, pictures, software, files etc... on my NAS so I will reproduce that in backup. I keep all of my backups zipped which reduces the storage cost and makes uploading/downloading easier when it's a single large file rather than potentially thousands of smaller ones. Anything that gets uploaded is now securely backed up so you can put backups of your pictures up there, important documents, emails or files, everything!
Automatic backup - Linux
As I mentioned earlier I have a local server running Ubuntu that also runs 4 x 3TB HDDs in RAID for me. I use these as a NAS drive and I already backup important items off my PC, MacBook, phones and tablets there. The problem is if my house burns down or floods or anything else then my NAS drive goes with it and the backup wasn't much use! I also don't want to have to backup locally to my NAS and to my online/cloud backup, that's too much work, so I'm going to use the Google Cloud SDK to automate backup for me! You can find instructions on a wide selection of platforms here but I'm going to run through setting it up on Ubuntu. First you need to add the package source.
export CLOUD_SDK_REPO="cloud-sdk-$(lsb_release -c -s)"

echo "deb http://packages.cloud.google.com/apt $CLOUD_SDK_REPO main" | sudo tee /etc/apt/sources.list.d/google-cloud-sdk.list
Next, add the Google Cloud public key.
curl https://packages.cloud.google.com/apt/doc/apt-key.gpg | sudo apt-key add -
You're now ready to install the Google Cloud SDK.
sudo apt-get update && sudo apt-get install google-cloud-sdk
Once installed simply run the init command and follow the instructions to login and authenticate the SDK so it can operate with your account.
gcloud init
Now you're ready to use the gsutil command which supports the rsync command amongst many, many others like cp, mv, rm etc... You can see all of the commands gsutil supports here. The command is simple and takes the following form.
gsutil rsync -r [source] [destination]
This means for me I simply specify the directory I want to copy from my local server up to the Storage account. I create a test directory in my home directory with a few text files and I want to upload them, this is the command.
gsutil rsync -r /home/scott/google-cloud gs://scott-blog-demo
The -r flag indicates that I want to recursively sync through any subdirectories in the source and copy them up to the destination too. Anything inside /home/scott/google-cloud will be uploaded. The rsync command will also check if the file exists before copying and only copy it if it has changed, saving a wasted upload. An important thing to note is that the command I have provided here will not delete items in the Storage account if they are deleted locally. That is possible if you add the -d flag but I left that out as I'd rather not risk it and the cost is so low it's nice to know that once it's backed up it's definitely safe or I can go and delete it manually if I really need to. When you run the command it will let you know exactly what's going on and tell you what it's uploading.
Building synchronization state...
Starting synchronization
Copying file:///home/scott/google-cloud/test.txt [Content-Type=text/plain]...
/ [1 files][    4.0 B/    4.0 B]
Operation completed over 1 objects/4.0 B.
The final step is to automate the backup process and the easiest way to do this is with a cron job. Create a script that you can run with cron, paste your gsutil command in and then make the script executable.
nano backup.sh
gsutil rsync -r /home/scott/google-cloud gs://scott-demo-bucket # add this <--
chmod +x backup.sh
Then simply call the script as often as you like with cron, I've gone for every night at midnight so my maximum time between backups is 24 hours and it will utilise my bandwidth when I'm not likely to be needing it myself.
00 00 * * * /path/to/your/backup.sh
That's it! You're all set and any files you place in the directory being backup up will automagically be backed up to Google Cloud Storage every night.
Automatic backup - Windows
Getting this setup on Windows is even easier. Head to the gsutil install page and grab the Cloud SDK Installer. Follow the setup instructions and at the end make sure to select "Start Cloud SDK Shell" and "Run gcloud init". Again, follow the instructions to completion and you're all set! You can now issue the same command as above, just using your Windows path instead.
gsutil rsync -r c:\Users\scott\Documents\google-test gs://scott-demo-bucket

Building synchronization state...
Starting synchronization
Copying file://c:\Users\scott\Documents\google-test\test.txt [Content-Type=text/plain]...
/ [1 files][    1.0 B/    1.0 B]
Operation completed over 1 objects/1.0 B.
In terms of automating the backup you can use the Task Scheduler or simply run the command as and when needed depending on your environment and if it will be online to run overnight backups. Either way, it's super easy and you have a reliable backup mechanism.
Versioning
Added: 7th Nov 2016
The rsync commands above will keep an exact copy of your files in GCP and whilst files deleted locally won't be deleted remotely, if they are updated locally they will be updated remotely. This means if you accidentally delete the contents of a file or change them, once the remote copy is updated you can't get it back. If you enable versioning then each change to a file will be remembered so you can go back and retrieve a previous version if you wish. Enabling versioning is easy, simply issue the following command and update it with the name of your bucket.
gsutil versioning set on gs://scott-demo-bucket
That's it, you now have versioning enabled for your files. This will use up more storage space to keep a version history for each file but it does provide a nice safety net too. If you want to turn versioning off then simply change on to off in the above command and issue it again.