
My new Ubiquiti home network is absolutely awesome but there was just one thing bothering me about it. Every time I logged in to the dashboard I'd have those nasty, red HTTPS warnings in the browser because it was using a self signed cert. It had to be fixed.
The problem
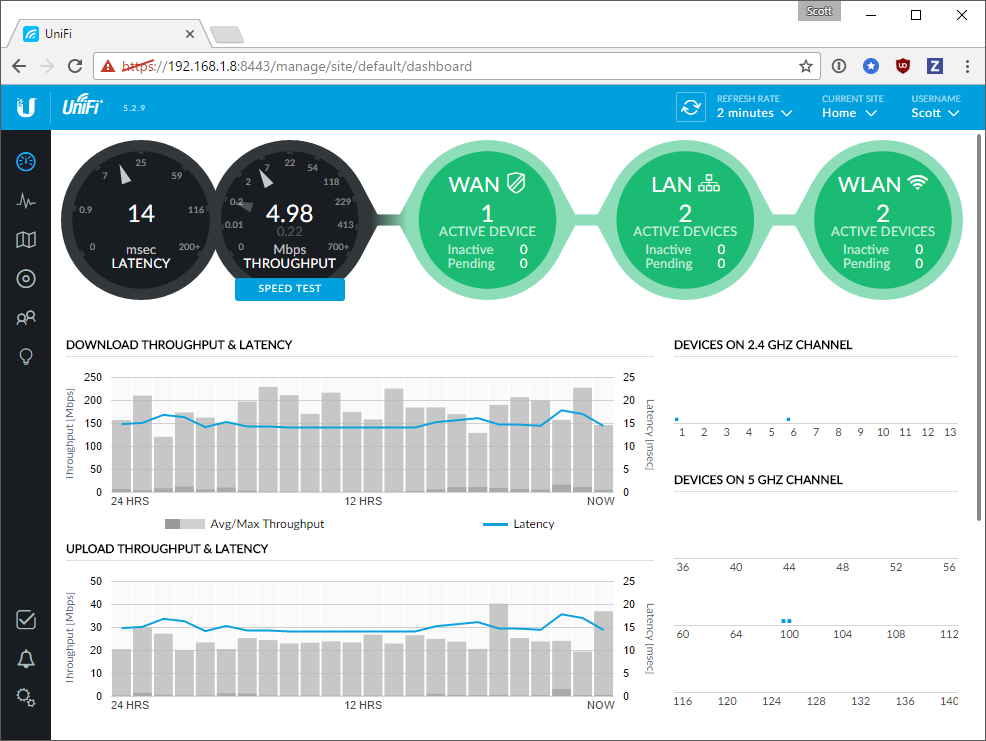
I recently wrote about my new Ubiquiti Home Network and so far I can't find a single fault with any of it. There is however one minor niggle that I wanted to do something about, this:
Every area of the web interface is beautiful except this horrible, red HTTPS warning in the browser because the device is using a self signed certificate. This actually turned out to be quite easy to fix, after hours of messing around, so here is the simple solution to save you the hassle.
First things first
There are 2 ways that you could tackle this problem. The first is to use your own self signed certificate, maybe with your own root CA, to get around the problem and get the green HTTPS indicator in the address bar. You can get Chrome and Firefox (possibly/probably other browsers but I don't use them) to trust a leaf certificate and remove the red warning or install a root CA to keep them all happy, but that wasn't the solution I wanted. I'm actually going to use a publicly trusted CA to issue the certificate for me and install that on my Cloud Key. My CA of choice is, of course, Let's Encrypt, but you can use any CA you like. The rest of this guide will be focused on how to install the certificate on the Cloud Key, not how to obtain a certificate, which is covered in Getting started with Let's Encrypt.
Hostname
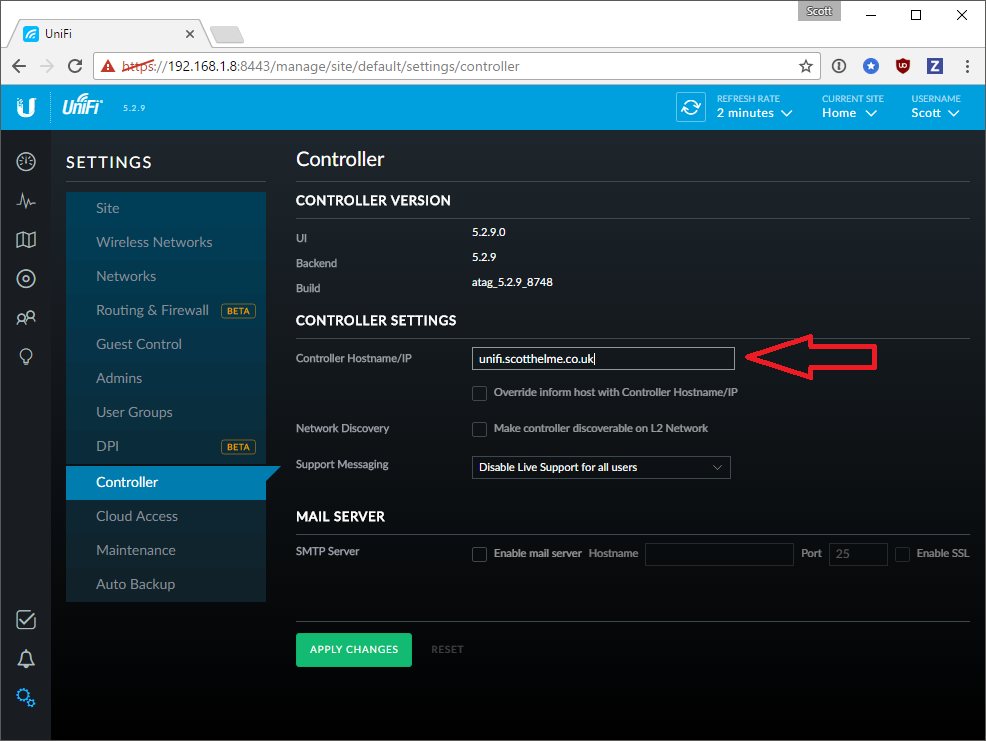
Now we have that out of the way you will need to decide on the hostname for your device. This will have to be a publicly addressable name if you're going to use Let's Encrypt as you will need to answer their challenge to issue the certificate. Other CAs may do this via email challenge so that won't be a concern. I decided to keep things simple and go for unifi.scotthelme.co.uk as mine. You will need to set this in the Settings section of the web interface, here:
Once that's set it's time to get the required files over on the Cloud Key and set them up.
SSH to the Cloud Key
If you're on Windows then grab PuTTY to use as your SSH client or Mac/nix users can SSH directly from the terminal. Grab the IP for your Cloud Key and connect on port 22 using the username root and password ubnt. Once you've connected it's probably a good idea to change that password using the passwd command. Before we get started, stop the Unifi service.
service unifi stop
After this we need to remove the symlink to the existing keystore. This is where the system looks for the keystore.
rm /usr/lib/unifi/data/keystore
Now copy the keystore that was symlinked into the location it was linked from. This means the file will still be where the system expected it to be.
cp /etc/ssl/private/unifi.keystore.jks /usr/lib/unifi/data/keystore
Now, rather than delete the file we're going to rename it so we have it around for later, just in case.
mv /etc/ssl/private/unifi.keystore.jks /etc/ssl/private/unifi.keystore.jks.old
We now need to create a new version of unifi.keystore.jks which is what the web interface will use, but using our own certificate instead. For the certificate that you got from your CA you will need the intermediate certificate and the root certificate in PEM form. If you have them in DER form then you can use the following command to convert them.
openssl x509 -in intermediate.der -inform DER -out intermediate.crt -outform PEM
Update the filename to suit your needs and that will take in a DER encoded certificate and output a PEM encoded certificate for you. You now need to create an entire chain file that also contains the root certificate.
cat signed.crt intermediate.crt root.crt > chain.crt
Once you have these files ready you can upload them to your Cloud Key along with the private key that you had signed. You can either SCP them from the terminal or Windows users can also download WinSCP and use the credentials above to login and have a drop and drop interface to upload files to the Cloud Key. These files need to be placed in /etc/ssl/private/. Once you've uploaded them you're ready to recreate the file we renamed earlier. The first step is to convert them to a PKCS #12 file.
openssl pkcs12 -export -in signed.crt -inkey rsa.key -certfile chain.crt -out unifi.p12 -name unifi -password pass:aircontrolenterprise
You must keep the same name, password and out values in the above command but update the in, inkey and certfile if needed. We can now convert this file into a JKS (Java KeyStore) which is what we need.
keytool -importkeystore -srckeystore unifi.p12 -srcstoretype PKCS12 -srcstorepass aircontrolenterprise -destkeystore unifi.keystore.jks -storepass aircontrolenterprise
This takes the PKCS #12 file and outputs the unifi.keystore.jks file that we removed earlier. With that in place, you're now ready to start the UniFi service again.
service unifi start
Now the controller is ready to answer for your new hostname with a valid certificate but if you've taken a similar approach to me, there is one last thing to configure. Because unifi.scotthelme.co.uk resolves to an IP that I use to answer my Let's Encrypt challenge, I needed to add a hosts entry on my PC to resolve it to the local IP instead.
192.168.1.8 unifi.scotthelme.co.uk
With that, I'm ready to go and it's looking good!

Advanced
This blog is focused mainly on how to actually put the certificate on your Cloud Key and get it working, but I wanted to provide a little more detail on my setup for those interested.
Let's Encrypt on the Cloud Key
As I mentioned in my previous blog I have a HP ProLiant MicroServer running at home that I use for various tasks. My unifi.scotthelme.co.uk subdomain resolves to the IP of that server which obtains the Let's Encrypt certificate for me as it can answer the challenge. The server then connects to the Cloud Key via SSH using key-based auth and copies the new certificate over and runs the commands to regenerate the JKS file and restart the UniFi service. This way there is zero maintenance for me and I keep the full benefits of Let's Encrypt and no worries. There is possibly a way that you could just run Let's Encrypt on the Cloud Key directly and my blog Getting started with Let's Encrypt would be a good place to start if you're interested. For me though I already have my server running locally so it was the easier approach.
ECDSA support
I got an RSA certificate for my Cloud Key because I wasn't sure if it was going to support ECDSA keys/ciphers. ECDSA keys are a lot faster, just look at Testing out ECDSA certificates, but in this scenario the benefits are probably not going to be noticed. I also doubt that it would support hybrid certificates but if you feel brave enough to try it out, let me know.
Automated renewal
If you go down the traditional route of obtaining a certificate from a CA then this won't apply to you but if you use a Let's Encrypt certificate you will need some kind of renewal process. You can renew your Let's Encrypt certificate on a fixed schedule with cron, say once a week or once a month.
* * 1 * * /path/to/renew.sh # Monthly on the 1st
* * * * 0 /path/to/renew.sh # Weekly on Sunday
I also wrote a blog about a script I created called Let's Encrypt Smart Renew. You can call this script hourly and it will only renew the certificate if it actually needs renewing.
0 * * * * /path/to/smartRenew.sh # Hourly on the first minute
Here is the actual script I'm using on my server to renew the certificate and update the Cloud Key with the new files.
#!/bin/bash
set -e

# Get a new certificate from Let's Encrypt.
python acme_tiny.py --account-key account.key --csr unifi.scotthelme.co.uk.csr --acme-dir /home/scott/acme/challenges > signed.crt

# Prep the certificate files and push them over to the Cloud Key.
cat signed.crt intermediate.crt root.crt > chain.crt
cat signed.crt intermediate.crt > cloudkey.crt
scp -i /home/scott/unifi/ssh signed.crt [email protected]:/etc/ssl/private
scp -i /home/scott/unifi/ssh chain.crt [email protected]:/etc/ssl/private
scp -i /home/scott/unifi/ssh cloudkey.crt [email protected]:/etc/ssl/private
scp -i /home/scott/unifi/ssh cloudkey.key [email protected]:/etc/ssl/private
cat update.sh | ssh [email protected] -i /home/scott/unifi/ssh
The contents of update.sh are the commands you want to execute on the remote host which are here.
service unifi stop
mv /etc/ssl/private/unifi.p12 /etc/ssl/private/unifi.p12.old
openssl pkcs12 -export -in /etc/ssl/private/signed.crt -inkey /etc/ssl/private/rsa.key -certfile /etc/ssl/private/chain.crt -out /etc/ssl/private/unifi.p12 -name unifi -password pass:aircontrolenterprise
mv /etc/ssl/private/unifi.keystore.jks /etc/ssl/private/unifi.keystore.jks.old
keytool -importkeystore -srckeystore /etc/ssl/private/unifi.p12 -srcstoretype PKCS12 -srcstorepass aircontrolenterprise -destkeystore /etc/ssl/private/unifi.keystore.jks -storepass aircontrolenterprise
tar -cvf /etc/ssl/private/cert.tar -C /etc/ssl/private cloudkey.crt cloudkey.key unifi.keystore.jks
cp /etc/ssl/private/unifi.keystore.jks /usr/lib/unifi/data/keystore
service unifi start
service nginx restart
DDNS
As I mentioned earlier I'm using a server I run at home to answer the Let's Encrypt challenge for the domain. To do that I need the domain to resolve to my IP address but here in the UK we don't get a static IP on residential connections. I'm using a bash variation of my CloudFlareDDNS script to update my Cloudflare DNS entry for that subdomain when the script to renew the certificate is being called. Whether or not you will need to do something similar will depend on your setup but it's something you may need.